
Water Softener Installation: Cost, Steps and DIY Guide
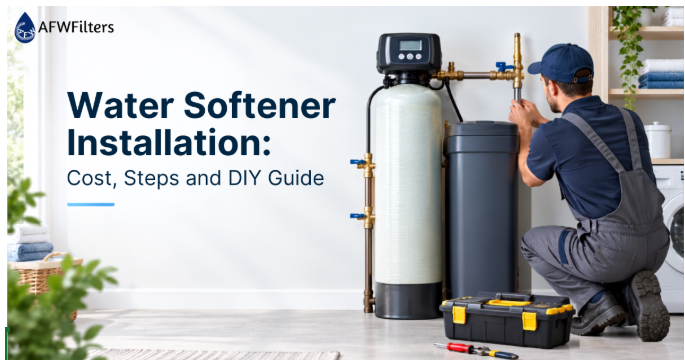
Your softener has arrived and it is sitting in a box in the garage. Now what? Installation is where a lot of first-time buyers stall. It looks harder from the outside than it is
KEY TAKEAWAYS
- DIY install: 2–4 hours; fittings $0–$150. Plumber adds $150–$500.
- All-in installed cost: about $1,200–$3,800 (equipment dominates).
- Main cost driver: missing house requirements (drain, outlet, or softener loop) add hundreds.
- Install on main cold line: after shutoff, before heater; tee outdoor spigots before the softener.
Your softener has arrived and it is sitting in a box in the garage. Now what?
Installation is where a lot of first-time buyers stall. It looks harder from the outside than it is: on a house with an accessible main line, a nearby drain and an outlet, this is a confident-DIYer job. The trick is understanding exactly what it involves before you start cutting pipe.
How Much Does It Cost to Install a Water Softener?
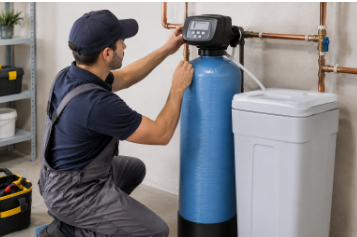
A DIY installation costs $0–$150 in fittings and takes 2–4 hours. Professional labour on an accessible install runs about $150–$500 at typical plumber rates of $100–$150 per hour. All-in system, labour and materials most US homes land between $1,200 and $3,800.
|
Route |
Equipment |
Labour & extras |
Typical total |
|
DIY, direct purchase |
$500 – $1,500 |
$0 – $150 fittings |
$500 – $1,650 |
|
Direct purchase + local plumber |
$500 – $1,500 |
$150 – $500 |
$650 – $2,000 |
|
Big-box install programme |
Bundled |
Bundled + referral margin |
$1,200 – $3,800 |
|
Dealer bundled package |
Bundled ("free install") |
Bundled |
$3,000 – $8,000 |
Industry cost guides put the national average in the same band: Angi's 2026 data and HomeGuide both centre on $1,200–$3,800 all-in, with Homewyse putting a basic installation starting around $1,131–$1,405.
What actually drives the price up
- No softener loop running new supply lines to and from the install point is the largest single add-on
- No nearby drain a new drain run, or a condensate pump if gravity is not available
- No outlet within reach adding a dedicated circuit typically runs several hundred dollars
- Galvanised steel pipe often needs partial replacement and dielectric unions
- Old unit removal and disposal
- Permit and inspection where local code requires licensed work on the main supply
|
Running cost, not just install cost. Budget roughly $50–$150 a year in salt for an average household, plus the water used in regeneration. A metered valve cuts both see our Fleck valve comparison for why. |
In most jobs the labour is the cheap part. What you are really paying for is whatever your house does not already have.
Pre-Installation Checklist
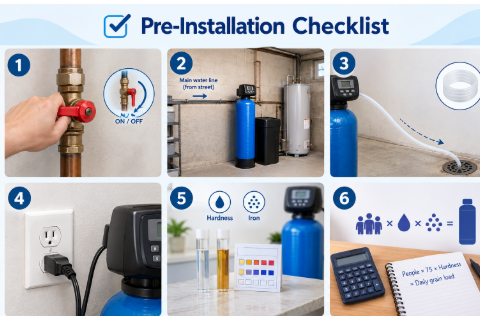
Confirm all six of these before touching a pipe. Every one of them is cheaper to solve now than halfway through the job.
- Locate the main water shutoff and confirm it closes fully. The softener goes on the main supply after the shutoff and before the water heater.
- Identify the installation point where the main line enters the house, typically a basement, utility room or garage, upstream of any fixture you want treated.
- Confirm drain access within reach of the supplied tubing (usually 3/8"), running downhill. The system cannot pump uphill.
- Confirm power to a standard 110V outlet within reach of the control head.
- Know your hardness and iron level. If there is measurable iron in a well supply, an iron filter belongs ahead of the softener.
- Confirm capacity. Multiply people × 75 gallons × your hardness in gpg to get daily grain load; the softener sizing guide turns that into a system size.
Tools and Materials
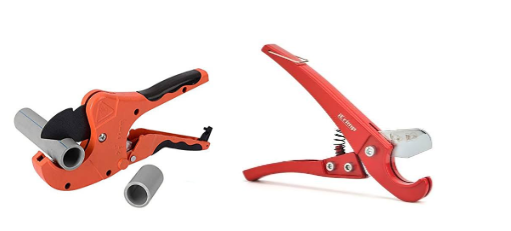
Most installs need only hand tools. The cutting tool depends on your pipe material.
- Pipe cutter tubing cutter for copper, PEX cutter for PEX
- Adjustable wrenches or channel locks; do not overtighten plastic valve fittings
- Fittings to suit: push-fit (SharkBite type), compression, PEX crimp, or solder and torch
- PTFE tape or pipe dope for threaded connections
- Bucket, towels, and a second person for the tank
- Hardness test kit for verification afterwards
- Unscented household bleach for sanitising (about 2 oz for a residential tank)
|
Fitting type |
Skill needed |
Tools |
Best for |
|
Push-fit (SharkBite) |
Low |
Cutter, deburr tool |
Fastest, works on copper/PEX/CPVC |
|
Compression |
Low–medium |
Wrenches |
No torch, easy to service |
|
PEX crimp |
Medium |
Crimp tool, rings |
Existing PEX homes |
|
Solder |
High |
Torch, flux, solder |
Most permanent, copper only |
Where to Install a Water Softener
On the main cold water supply, downstream of the main shutoff and pressure regulator, and upstream of the water heater. Outdoor spigots and irrigation should tee off ahead of the softener.
- Never install after the water heater. Hot water damages softener resin.
- Do not soften irrigation or outdoor spigots. Softened water is not ideal for plants and you would be paying salt to water the lawn.
- Basements and utility rooms are the simplest: accessible main line, drain usually nearby, stable temperature.
- Garages work in mild climates. In freezing climates the softener must be in conditioned space or the resin tank can crack.
- On a well system, install downstream of the pressure tank and downstream of any iron filter.
Step-by-Step Plumbing Connections
Seven steps, 2–4 hours for a first-timer on a standard setup.
- Shut off the main water supply. Close the main valve, then open a downstream faucet to release line pressure. Confirm flow has stopped before cutting anything.
- Cut into the main line. Measure and mark, allowing room for the bypass valve and the inlet/outlet connections. Tubing cutter for copper, PEX cutter for PEX. Measure twice the softener has to fit between your cuts with fittings on both sides.
- Install the bypass valve. Connect it to the inlet and outlet ports on the control head. Direction matters: IN takes the supply side, OUT feeds the house. Both are marked on the valve. Every softener should have a bypass. It is how you isolate the unit for salt, service or a holiday.
- Connect to the main line. Supply to the IN side, distribution to the OUT side. Check alignment before tightening; a misaligned joint under pressure will weep. Do not overtighten plastic threads.
- Set up the brine tank and drain line. Place the brine tank within the supplied brine line length (typically 6–10 ft) with clearance to add salt. Run the drain line from the control head drain port downhill to the drain, and maintain a 2-inch air gap between the line end and any standing water to prevent backflow. Clamp it so it cannot jump out during regeneration.
- Add salt and water to the brine tank. Fill about two-thirds with solar salt or pellets. Add roughly 3–4 gallons of water manually, or let the first regeneration fill it.
- Program the control head. Set time of day, your measured hardness in gpg, and a regeneration time 2:00 a.m. is standard. On a Fleck 5600SXT this takes about ten minutes; AFW systems ship pre-programmed for the tank supplied.
No floor drain? Three options
- Laundry standpipe or utility sink the most common alternative; keep the air gap
- Condensate pump a small reservoir with a float switch that lifts discharge to a higher drain. Size it for the drain flow rate of your valve, not just for condensate
- Sump pit acceptable in many jurisdictions, but check local code before discharging brine to a sump that daylights outside
|
Septic systems. Most modern septic systems handle softener discharge without issue, but a minority of jurisdictions restrict or prohibit it. Check local code before you plumb the drain. It is a five-minute call that occasionally changes the whole install plan. |
|
Salt type |
Purity |
Cost |
Notes |
|
Solar salt |
~99.6% |
Low |
Good general choice |
|
Evaporated pellets |
~99.9% |
Higher |
Least bridging, best for low-use homes |
|
Rock salt |
~98–99% |
Lowest |
More insolubles; more tank cleaning |
|
Potassium chloride |
High |
Highest |
For sodium-restricted households |
Start-Up, Sanitising and First Regeneration
Do not just turn the water back on. Repressurise slowly to purge air, sanitise the tank, run a manual regeneration, and only then put the system into service. This is the stage that separates a clean install from a week of cloudy water and support calls.
- Put the bypass in bypass, then open the main shutoff and check the house plumbing for leaks first.
- Sanitise. Pour about 2 oz of unscented household bleach into the brine well before the first regeneration.
- Open the bypass slowly a quarter turn, wait, then a little more. Fast repressurisation drives air through the resin bed and can push resin into the plumbing.
- Purge air. Open a cold tap downstream and let it run until it stops spitting and runs clear.
- Run a manual regeneration. Hold the regeneration button (five seconds on an SXT head). Watch the drain line during backwash and brine draw to confirm both are happening.
- Check every joint at pressure inlet, outlet, bypass, drain and brine connections.
- Top up the brine tank with salt once the cycle completes.
|
Cloudy or slightly salty water for the first day is normal while the bed settles and residual brine flushes. If it persists past 24–48 hours, something in the cycle is not completing see the troubleshooting table. |
Post-Install Verification
Three checks, at 15 minutes, 24 hours and 48 hours.
- At 15 minutes: every connection dry, drain line secure, unit powered and displaying time of day.
- At 24 hours: water clear, no salty taste, brine tank water level roughly where the float sets it.
- At 48 hours: run a hardness test kit at a treated cold tap. A correctly programmed system should read at or near zero grains. If it does not, the hardness or capacity setting is the first thing to check, not the plumbing.
Troubleshooting
|
Symptom |
Likely cause |
Fix |
|
Still hard water after 48 hours |
Hardness or capacity programmed wrong; bypass left in bypass |
Re-enter hardness in gpg; confirm bypass is in service position |
|
Salty taste persisting past two days |
Regeneration not completing; drain restricted |
Check drain line for kinks; run a manual regeneration and watch each step |
|
Brine tank full of water |
Wrong refill setting or failed brine valve |
Check safety float and brine line flow control |
|
Leak at a bypass joint |
Misalignment or overtightened plastic thread |
Depressurise, realign, reseat O-rings do not add more torque |
|
Low pressure after install |
Bypass partially closed, or undersized valve for the home |
Confirm bypass fully open; check valve flow rating against demand |
|
Resin beads in fixtures |
Repressurised too fast, or damaged distributor |
Flush aerators; if it continues, inspect the distributor tube |
Ready to Install?
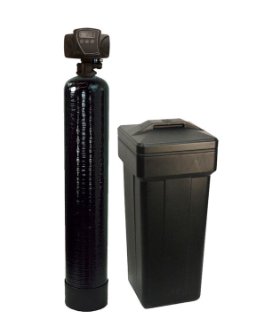
Every AFW system ships with the resin pre-loaded, the bypass fitted and the valve pre-programmed for the tank supplied, so most customers are plumbed in and running the same afternoon. Browse water softener systems for home, check capacity with the softener sizing guide, or call 785-661-2241 during business hours including mid-install, which is when most people call.
Frequently Asked Questions
Can I install a water softener myself?
Yes, for most standard installations. If you have basic plumbing experience, accessible copper or PEX pipe, a drain within reach and a nearby outlet, this is a 2–4 hour DIY job. Galvanised pipe, walls that need opening, or a local permit requirement are the reasons to hire a plumber.
How much does it cost to install a water softener?
DIY costs $0–$150 in fittings. Professional labour on an accessible install runs $150–$500 at typical rates of $100–$150 per hour. All-in systems included most US homes fall between $1,200 and $3,800, with the equipment making up most of that.
How long does a water softener installation take?
Two to four hours for a first-timer on a standard setup, and under two hours for a plumber on a home with an existing softener loop. Add time if you need to run a drain line or fit an outlet.
What is a bypass valve and why do I need one?
A bypass valve isolates the softener from the water supply without shutting off water to the house, so you can service the unit, wait on a salt delivery or troubleshoot without going without water. All AFW systems include one.
How do I set up the drain line?
Run it from the control head's drain port to a floor drain, utility sink or standpipe, downhill the whole way, never submerged. Maintain a 2-inch air gap between the line end and the drain water level to prevent backflow, and clamp it so it cannot dislodge during regeneration.
What if I don't have a floor drain?
Use a laundry standpipe or utility sink if one is within reach, or fit a condensate pump sized for the valve's drain flow rate to lift discharge to a higher drain. A sump pit works in many areas but check local code first.
Can a water softener drain into a septic system?
In most jurisdictions, yes modern septic systems generally handle softener discharge without harm. A minority of areas restrict it, so confirm local code before plumbing the drain.
Recent Posts
-
Understanding Water Filter Replacement Parts: Cartridges, O-Rings & Housings
Replacing a water filter cartridge sounds simple until you're standing in front of your housing with …Published Date: Oct 14 2026 -

Water Softener Installation: Cost, Steps and DIY Guide
Your softener has arrived and it is sitting in a box in the garage. Now what? Installation is where …Published Date: Oct 5 2026 -

Residential Water Softener Systems: How to Choose the Right Size & Type
There is a real difference between water that simply comes out of the tap and water that actually fe …Published Date: Sep 17 2026